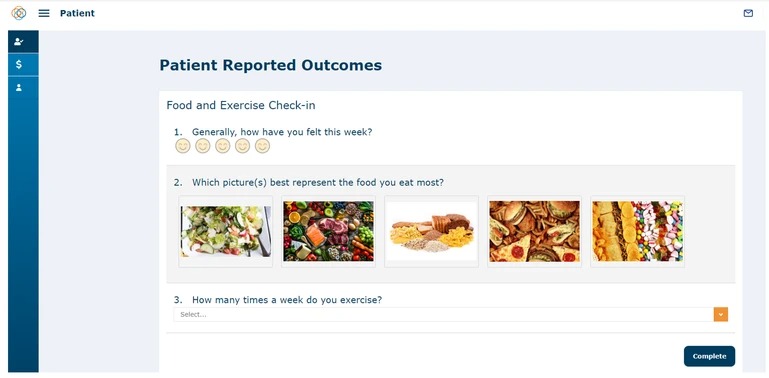
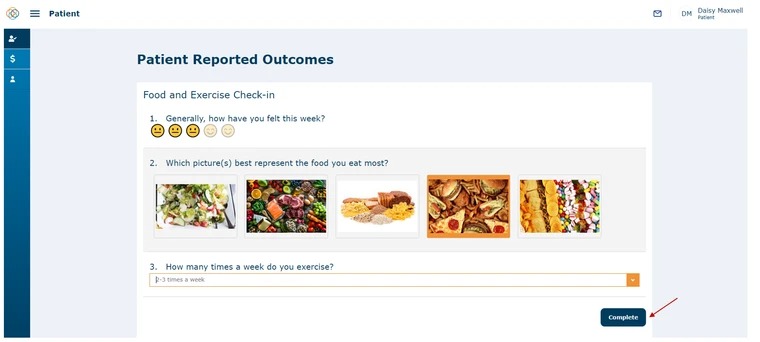
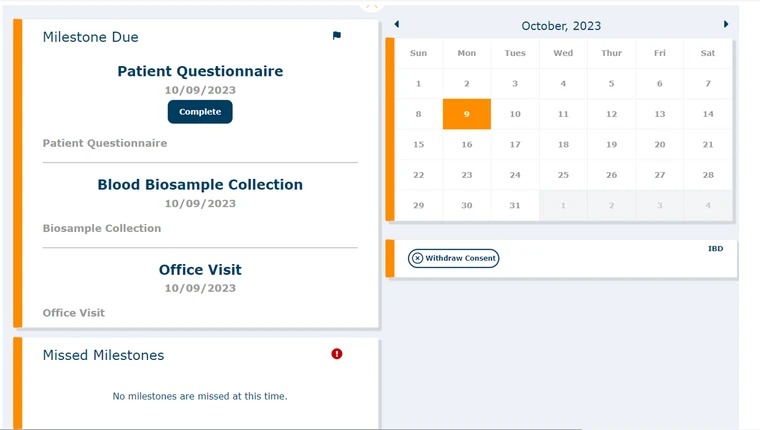
‘PROs’ (Patient-Reported Outcomes) are a set of questions that are completed by patients to provide information about your diagnosis. All PROs should be completed by you. In the below example, we see a ‘Food and Exercise PRO' Milestone. You can choose to ‘Complete PRO’ via the ‘Patient Journey’ or in the 'Milestone Due' cards below. Once you complete the PRO by answering all the questions and clicking ‘Complete', then the Milestone will be complete. You will then see a completion screen allowing you to get compensated for the milestone or milestones you just completed. If you have more than one PRO available to you, the system will string them together so you can complete one after another. There is an option to stop and continue later in between PROs. The Milestone count will be updated to reflect the correct number of Milestones Complete. You will receive an email stating ‘Milestone Completed’.
Note: These are sample PROs, PROs will differ as they correlate to the study you are enrolled in and your demographic or medical information.

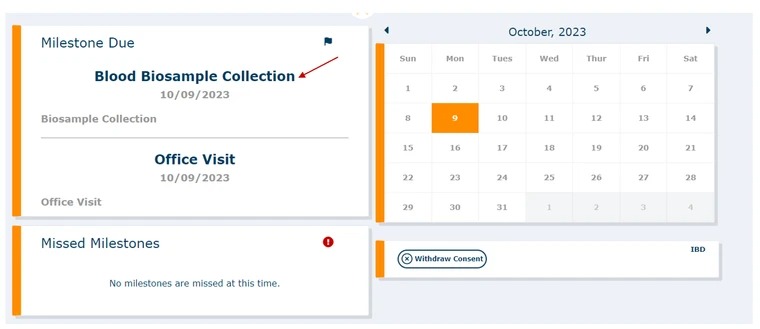
When filling out a PRO, you should choose the relevant answer by clicking on the radio buttons, pictures, checkbox, etc. and clicking ‘Next’ or ‘Complete’ to continue.
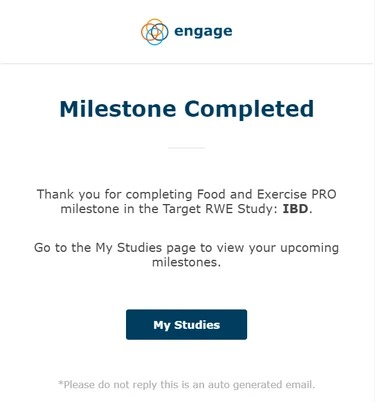
Below is an example of the email sent to you once the milestone has been completed.
If you have one PRO to complete, once you click the ‘Complete’ button you will be presented with a ‘Completed Surveys’ screen where you can choose ‘Done’ or ‘Get Paid’. In our example, we will choose ‘Get Paid’ which will be seen further down in this document.
Clicking on ‘Done’ will bring you back to the My Studies Page

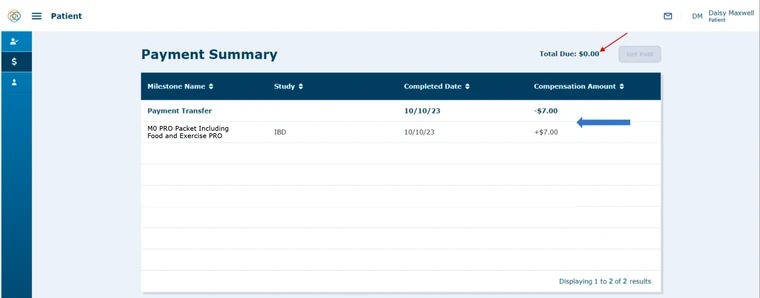
In situations where you have more than one PRO available to you as part of a PRO Packet, the system will walk you through completing all of the PROs, and at the end you have the option to ‘Get Paid' for the PRO Packet you just completed or you can click on ‘Done’ and choose to get paid at a later time through the Payment Summary page. Getting paid through the 'Payment Summary’ page will compensate you for the Total Due at the top of the page, while getting paid at the end of a packet of PROs will only pay you for the PROs you just completed.
Note: Once you have completed the questions in a PRO and click Complete (seen in the prior screenshot), if you have more than one PRO to complete at that time, you will have the option to ‘Save Progress' or ‘Continue to Next' to continue onto the next PRO. It is best practice that you complete all PROs in one sitting and elect 'Continue to Next' until you have finished the last PRO.

If you press the ‘Save Progress’ button, you will be navigated back to the ‘My Studies’ screen. This is useful for when you don’t have the time to finish all of the PROs and you would like to finish one at that time and finish the others later. Keep in mind that you cannot save your progress in the middle of a PRO or questionnaire, you must complete at least one PRO and once you are prompted with the screen (as seen in the above screenshot), then you can save your progress. Any PRO that is closed out in mid-progress will not be saved but can be started over at a later time. If you click on ‘Continue to Next’ it will bring up the next PRO milestone that needs to be completed at that time.
The PRO shown in the screenshots is a sample of a Pain Rating PRO and is an example PRO for demonstration. In this example, since we only have one PRO, we are choosing to ‘Get Paid’. There are 3 payment methods to get paid; Venmo, PayPal, or by the site, which in this case is Duke. Once you click on ‘Get Paid’, you will be able to choose your payment method via the dropdown. Click on ‘Transfer’ to transfer the money to your account. We will go into more detail on how to ‘Get Paid’ further in this document.
If you do not have a PayPal or Venmo account linked, the system will give you the option to link a new account or to get paid by the site. If you want to set up a digital payment account, it will bring you to the profile page where you can set those up. The dropdown in the screenshots you see below will display your preconfigured payment account(s) and also the option to get paid by the site.
Note: In some cases, the site that is running your study might not allow payments to be made by the site. If this is the case, the site will inform you that they cannot pay you through the site and you must get paid digitally through the app using Venmo and PayPal. In cases like these, it is important to not select the ‘get paid by site’ option in the get paid workflow. If your site has specifically informed you that they can pay you through the site, then only can you choose the option to ‘get paid by site’. If no payment instructions were given, then choose the payment method that best suits your needs.

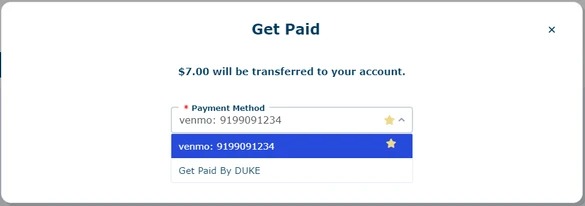
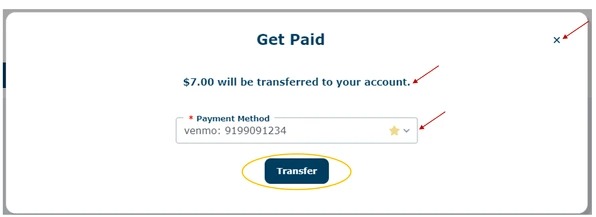
Once you press ‘Transfer’ you will receive a message box that your Transfer Request has been Received. Press ‘Done’ when finished.

After pressing ‘Done’, you will be navigated back to the Payment Summary screen where you can see both the payment and the payment transfer. Notice ‘Total Due’ is now $0.00.
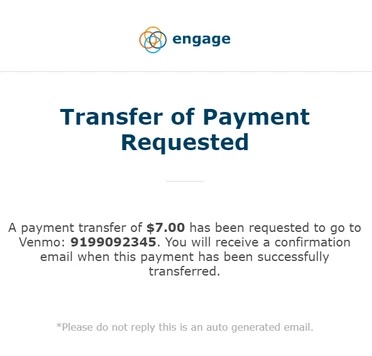
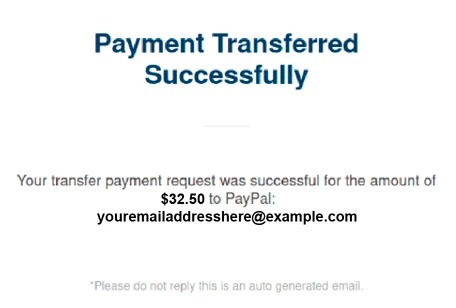
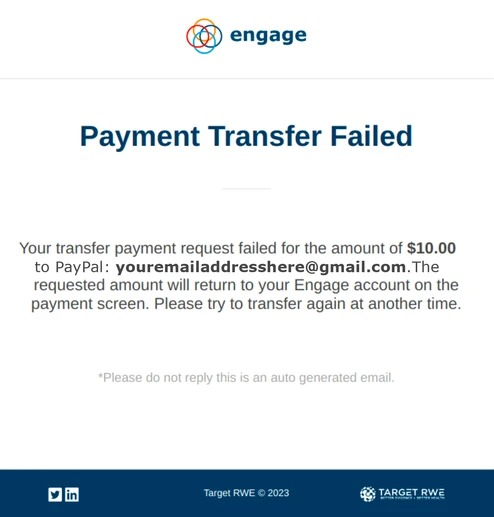
As seen below, you will also receive an email stating ‘Transfer of Payment Requested’ with the amount and account specified. You will also receive an email stating ‘Payment Successful’ or ‘Payment Failed’.
Below is an example of an email sent to you once the payment has been transferred successfully.
Below is an example of an email sent to a patient if the payment transfer fails.
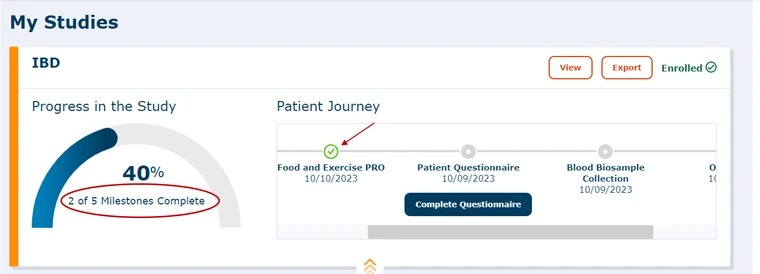
Once you have gone through the Payment process as seen above, click on the ‘My Studies’ icon to see ‘Progress in the Study’ and ‘Milestones Due’. Notice that we now have ‘2 of 5 Milestones Complete’.
Qatch a tutorial video on patient-reported outcomes (PROs):
Watch a tutorial video on how to get paid:
