Once the patient has completed the consent document and validated their consent, the Site Admin will now see that the patient's Enrollment Status is now ‘Pending Approval’. At this point the Site Admin will need to review the patient’s demographics, history, etc. to see if they meet the study inclusion or exclusion criteria. The Site Admin will then decide if they will approve or deny the patient's enrollment.
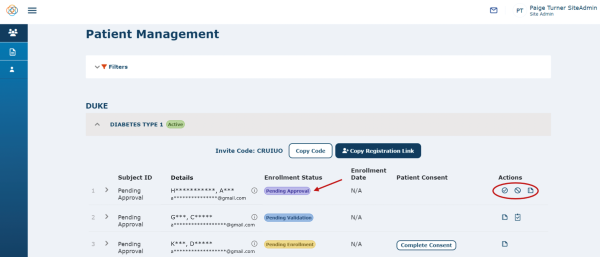
Pending Approval Actions That May Be Needed from Site Admin
In order for the Pending Approval Milestone to be completed, Site Admins need to take one of the following actions: Approve Enrollment or Deny Enrollment.
Approve Enrollment
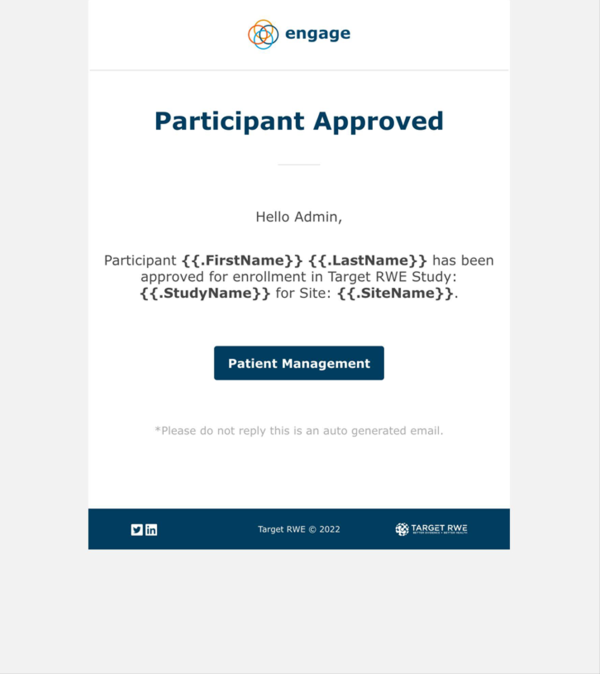
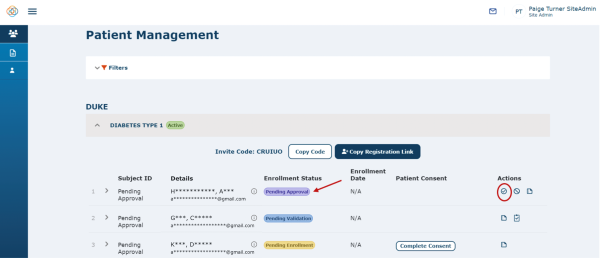
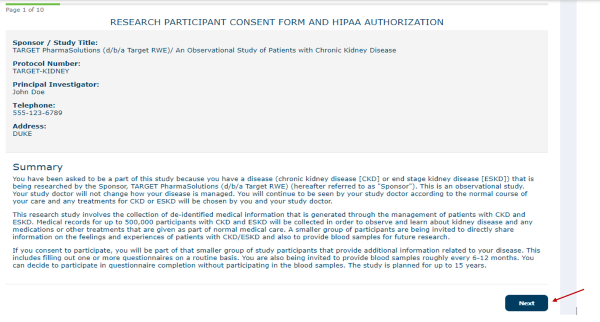
If the Site Admin wants to approve the patient’s enrollment, they will click on the ‘Approve Enrollment' icon. You will then be presented with the patient’s consent form. Site Admins need to review the Patient’s consent form as the final check to see what the Patient consented to and if the patient can be Approved for Enrollment. Click the ‘Next’ button in order to continue through the patient’s consent form. Notice that any optional consent buttons (i.e. Biospecimens) are disabled because they have been completed by the patient and the Site Admin only has viewing ability on the document until the very end where they can acknowledge their review of the consent document and approve the Patient’s enrollment. The Site Admin will also receive a ‘Participant Approved’ email notification.
The last step is for the Site Admin to Sign the Document and press ‘Complete’. Once you sign the document and presses ‘Complete’, you will be navigated back to the ‘Patient Management’ screen. Signing the consent document as a Site Admin is an extra verification check to signify that the consent has been reviewed by the site.
Note: Once you have signed your name in the Site Admin Signature box, you have the option to press ‘Previous’ to go back to the previous screen or to press the 'X' button in order to clear your signature and then re-sign the consent form again.
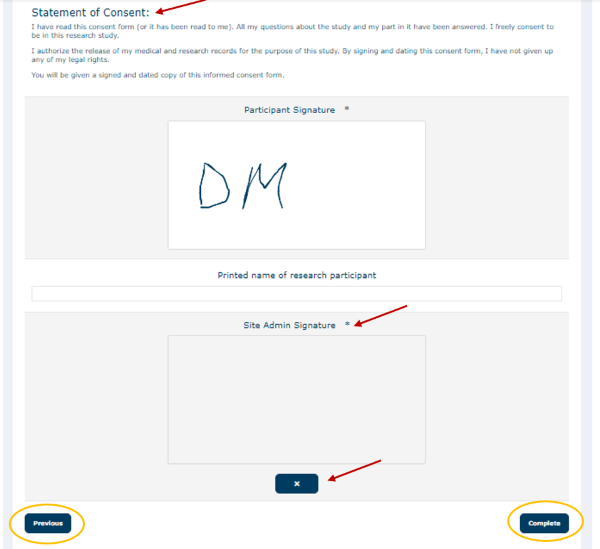
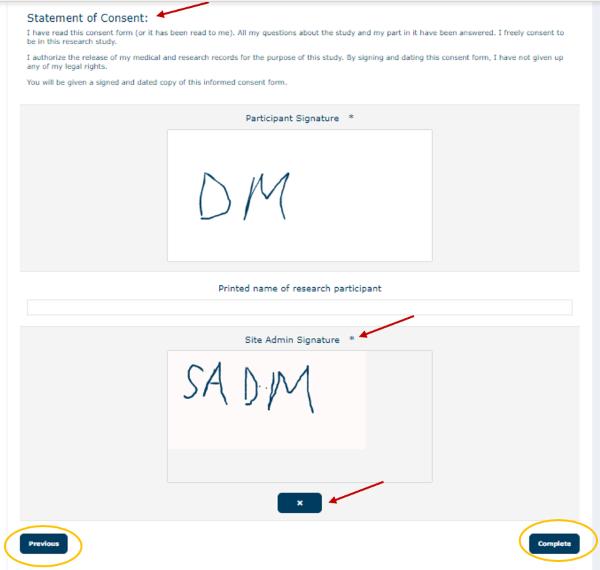
Note: After pressing the ‘Complete’ button, you will see a message box in the top right corner of the screen stating Success, Consent Saved.

Once you have signed the consent form and pressed the ‘Complete’ button, then the consent form will be saved, and the patient will be enrolled in the study. Notice that you will see ‘View Consent' and ‘Reconsent’ under the Patient Consent column, and ‘Deny Enrollment’ and ‘Enrollment Log’ under the Actions column.
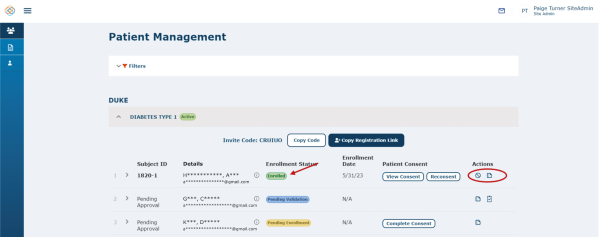
Enrollment Log:
If the patient has been Approved Enrollment the Enrollment log will look like the following:
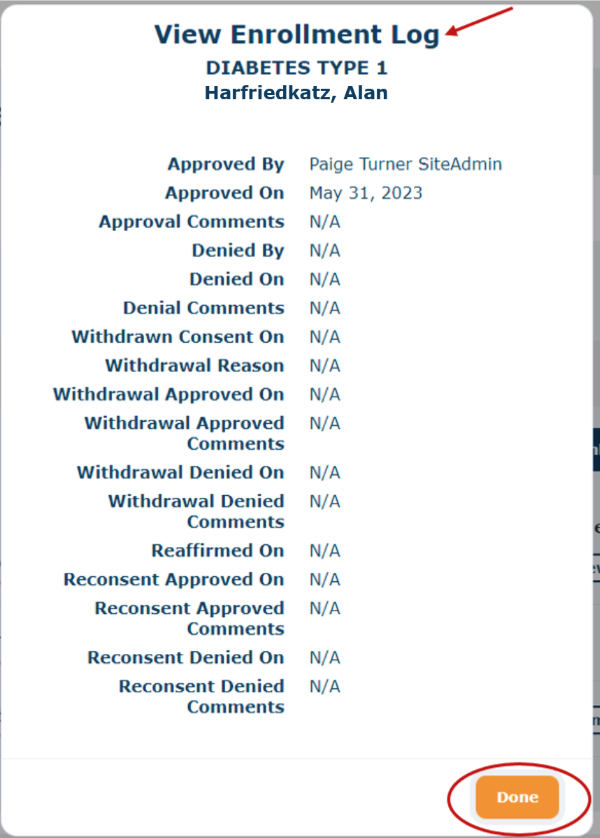
Deny Enrollment
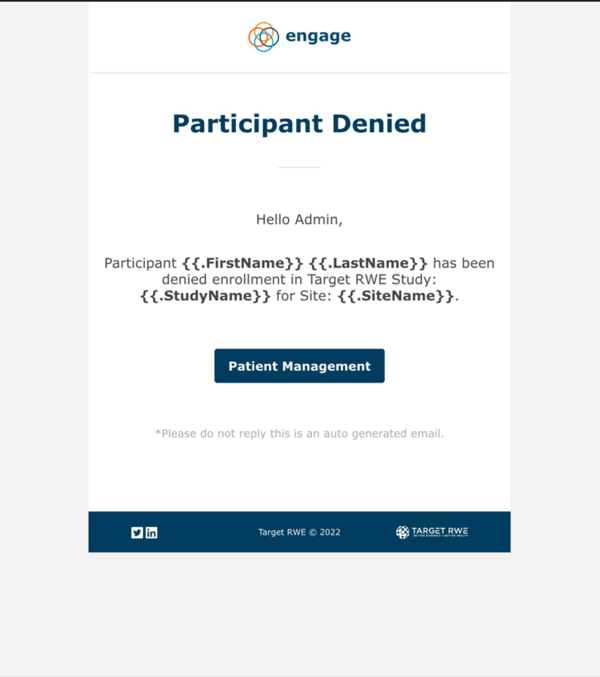
If the Site Admin determines that an invited patient no longer meets the study criteria, you can deny the patient’s enrollment in the study. You will also receive a ‘Participant Denied’ email notification.
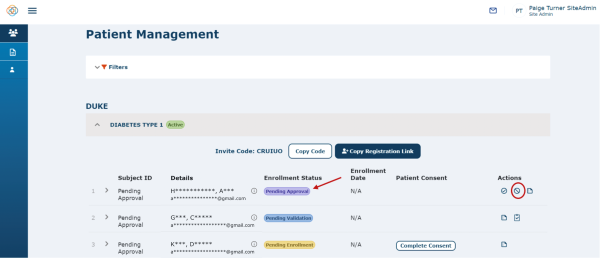
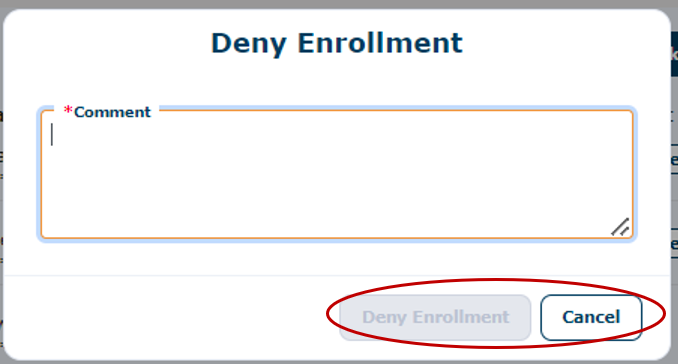
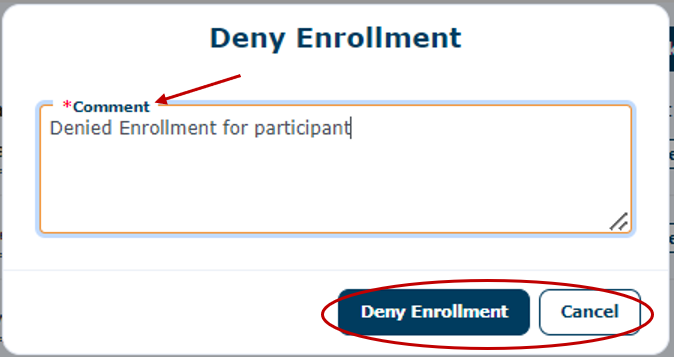
If you click on the ‘Deny Enrollment' icon, you will be navigated to a message box where you can enter a comment and choose ‘Deny Enrollment’ to deny the patient enrollment or press ‘Cancel’ to cancel and go back to the Patient Management screen. Notice that the comment field is a required field and that the ‘Deny Enrollment’ button is disabled until you enter a comment.
If the Site Admin denies enrollment, the patient will have an Enrollment Status of ‘Declined’ and the study will no longer be visible by the patient in the Patient Engagement Application. If the patient's records change and they later meet the criteria, then they can be reevaluated for enrollment. If the Site Admin wishes to enroll the patient at a later time, they can go to the enrollment milestone for that patient, upload a consent document for them, mark the enrollment as complete, put in the date the consent was completed, and the patient will be entered into the study.
Notice also that the only action available at this point is ‘Enrollment Log’.

Note: The participant will also receive an ‘Enrollment Denied’ email notification as seen below.

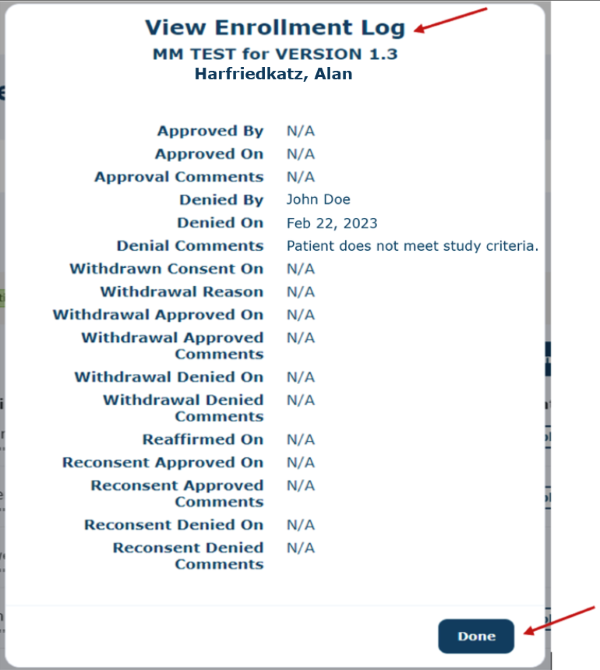
Enrollment Log:
If the patient has been Denied Enrollment, the Enrollment Log will look like this:
Watch a tutorial video on how to approve or deny:
